Welcome to the Midea MAP14AS1TWT-C installation manual. This guide provides essential instructions for installing, operating, and maintaining your portable air conditioner. Ensure proper setup for optimal performance.
1.1 Overview of the Midea MAP14AS1TWT-C Air Conditioner
The Midea MAP14AS1TWT-C is a portable air conditioner designed for efficient cooling and heating in various spaces. It features a sleek, compact design and is ideal for rooms up to 500 square feet. This unit offers multiple operating modes, including Cool, Heat, Fan, and Dry, providing versatile climate control. The MAP14AS1TWT-C is part of Midea’s Duo series, known for its advanced dual-hose technology, which enhances cooling efficiency and reduces energy consumption. With smart features like Wi-Fi connectivity and voice control, it integrates seamlessly with modern smart home systems. The unit is also eco-friendly, using an R-32 refrigerant that minimizes environmental impact. Weighing approximately 73.85 lbs, it is lightweight and easy to move between rooms. This manual will guide you through its installation, operation, and maintenance to ensure optimal performance and longevity.
1.2 Importance of Following the Installation Manual
Adhering to the installation manual is crucial for the safe and effective operation of the Midea MAP14AS1TWT-C air conditioner. Proper installation ensures optimal performance, energy efficiency, and prevents potential hazards. Misinstallation can lead to issues such as leaks, electrical problems, or reduced cooling capacity. The manual provides detailed steps and safety precautions, which, if ignored, may void the warranty or cause safety risks. Additionally, correct installation is essential for maintaining the unit’s efficiency and extending its lifespan. Always follow the guidelines to ensure your air conditioner functions as intended and remains safe for use. Failure to comply may result in damage to the unit or nearby property, emphasizing the importance of careful adherence to the instructions provided.
Safety Precautions
Ensure safe installation and operation by following these guidelines: avoid electrical hazards, keep the area clear, and maintain proper ventilation. Always prioritize caution to prevent accidents.
2.1 General Safety Guidelines
Always follow these general safety guidelines to ensure safe installation and operation of your Midea MAP14AS1TWT-C air conditioner. Read the manual carefully before starting any installation or operation. Ensure the unit is placed on a firm, level surface away from flammable materials. Avoid exposing the unit to direct sunlight or extreme temperatures. Keep children and pets away during installation and operation. Never operate the unit if it has been damaged or dropped. Ensure proper ventilation to avoid carbon monoxide buildup. Follow all local safety regulations and manufacturer recommendations. Regularly inspect the unit for signs of wear or damage. Always unplug the unit before performing any maintenance or cleaning. Failure to follow these guidelines may result in injury, damage, or void the warranty.
2.2 Electrical Safety Considerations
Ensure the Midea MAP14AS1TWT-C air conditioner is installed and operated with proper electrical safety. Always use a grounded power outlet rated for the unit’s power consumption. Avoid using extension cords or adapters, as they may cause fire hazards. Keep the power cord away from water and heat sources. Never touch electrical components with wet hands. If the unit is not functioning properly, unplug it immediately and contact a qualified technician. Regularly inspect the power cord for damage or wear. Do not overload circuits, as this can lead to electrical fires. Always follow the manufacturer’s electrical specifications to prevent hazards. Proper electrical installation ensures safe and efficient operation of your air conditioner.
2.3 Handling and Storage Precautions
Handle the Midea MAP14AS1TWT-C air conditioner with care to avoid damage. Always lift the unit securely, avoiding drops or impacts that could harm internal components. When storing, ensure the unit is clean and dry to prevent mold or rust. Use the original packaging or a protective cover to safeguard against dust and scratches. Store the air conditioner in an upright position to maintain stability. Keep it in a cool, dry place away from direct sunlight or extreme temperatures. Avoid exposing the unit to moisture or humidity, as this can damage electrical parts. Before reusing after storage, inspect for any damage or blockages. Proper handling and storage ensure longevity and optimal performance of your air conditioner.
Unpacking and Preparation
Carefully unpack the Midea MAP14AS1TWT-C air conditioner and inspect for damage. Verify all accessories are included and prepare the installation site according to the manual’s guidelines.
3.1 Unpacking the Unit and Accessories
Carefully unpack the Midea MAP14AS1TWT-C air conditioner from its box, ensuring all components are included. Inspect the unit for any visible damage or dents. Check for accessories like the window kit, exhaust hose, remote control, and installation manual. Ensure all parts are in good condition before proceeding. Handle the unit with care to avoid scratches or damage. Place the air conditioner on a sturdy, flat surface during unpacking. Verify the completeness of the package to avoid missing items. If any damage or missing parts are found, contact customer support immediately. Proper unpacking ensures a smooth installation process and prevents potential issues during operation.
3.2 Checking for Damage or Missing Parts
Once unpacked, thoroughly inspect the Midea MAP14AS1TWT-C unit and accessories for any signs of damage, such as dents, scratches, or broken components. Verify that all items listed in the manual are included, including the window kit, exhaust hose, remote control, and installation guide. Check for any missing screws, adapters, or other hardware. If damage or missing parts are identified, do not proceed with installation. Contact Midea customer support immediately to resolve the issue. Ensure all components are in pristine condition before moving forward, as damage or omissions may void the warranty or lead to operational issues. Proper inspection ensures a smooth and successful installation process. Handle the unit with care to prevent further damage during the verification process.
3.3 Preparing the Installation Site
Before installing the Midea MAP14AS1TWT-C, ensure the installation site is properly prepared. Choose a flat, stable, and level surface to place the unit, ensuring it is firm and even. Verify that the location provides adequate ventilation to prevent recirculation of hot air. Avoid direct sunlight exposure, as it may affect performance. Ensure the area is clear of obstructions, leaving at least 20 inches of space around the unit for proper airflow and maintenance access. Check that the installation site is close to a suitable window for the exhaust hose and power outlet. Ensure the floor or surface can support the unit’s weight (approximately 73.85 lbs). Clean the area to prevent dust or debris from interfering with the installation process. Proper site preparation ensures safe and efficient operation of the air conditioner. Follow these steps to create an ideal environment for your portable AC.

Installation Process
Install the Midea MAP14AS1TWT-C by choosing a suitable location, fitting the window kit, connecting the exhaust hose, and plugging in the unit. Follow manual steps carefully.
4.1 Choosing the Installation Location
Selecting the right location is crucial for optimal performance. Ensure the area is well-ventilated and the unit is placed on a level surface. Ideal spots include near a window for exhaust hose installation. Avoid direct sunlight or obstructions. For sliding or hung windows, use the provided window kit to maintain a proper seal. Ensure the unit is at least 1 meter away from combustible materials if using the electric heater. Secure the unit to prevent tipping and ensure proper airflow. Choose a location that allows easy access to the control panel and remote control. Proper placement ensures efficient cooling, heating, or fan operation, depending on your needs. Follow manual guidelines for window setup and unit positioning to maximize efficiency and safety.
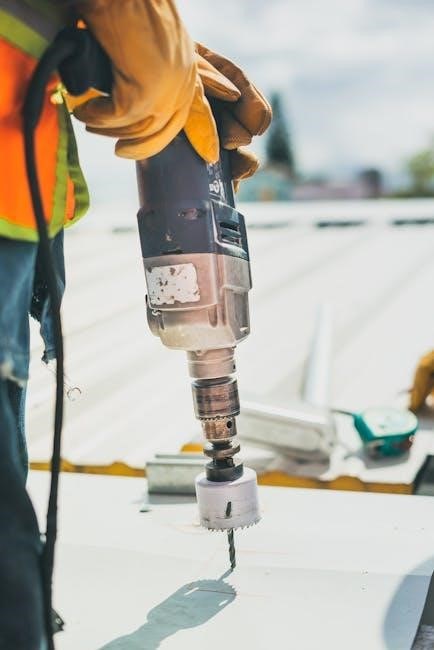
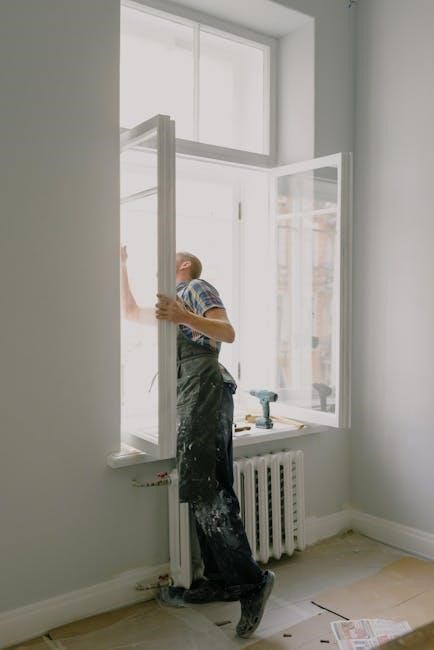
4.2 Installing the Window Kit
Begin by measuring your window to determine the correct size for the window kit components. Cut the foam seal strip to match the window height and insert it between the glass and frame to prevent air leaks. For hung or sliding windows, attach the window adapter to the unit and align it with the window frame. Secure the adapter firmly to ensure a tight seal. Once in place, ensure the exhaust hose is properly connected and directed outside. Test the seal by checking for air leaks around the window. A secure installation prevents hot air from recirculating and maintains efficient cooling or heating performance. Follow the manual’s specific instructions for your window type to achieve the best results. Proper installation ensures optimal functionality and energy efficiency. Always ensure the unit is level and secure during installation.
4.3 Setting Up the Exhaust Hose
Connecting the exhaust hose is essential for proper ventilation. Attach the hose to the unit using provided connectors, ensuring a secure fit. Direct the hose towards a window or external vent to expel hot air. Use the window kit to support the hose, adjusting its length as needed. Avoid kinks or bends that could restrict airflow. If necessary, cut the hose to the recommended length. Test the setup by running the air conditioner to ensure the hose effectively vents hot air. Check for leaks and tighten connections if needed. Proper installation ensures efficient cooling and prevents hot air recirculation. Refer to the manual for troubleshooting or additional guidance. This step is crucial for optimal performance and energy efficiency.
4.4 Connecting the Unit to Power
Plug the unit into a grounded electrical outlet rated for the specified voltage (120V, 60Hz). Ensure the power cord is undamaged and securely connected to both the unit and the outlet. Avoid using extension cords, as they may cause power issues. If necessary, consult a licensed electrician to ensure the outlet meets the unit’s power requirements. Do not modify the power cord or plug, as this could void the warranty or pose safety risks. After connecting, verify the unit turns on and operates correctly. If issues arise, refer to the troubleshooting section or contact customer support. Proper power connection is critical for safe and efficient operation. Always follow the manual’s guidelines to avoid electrical hazards. Ensure the outlet supports the unit’s power consumption before use. Test the unit after setup to confirm functionality.
4.5 Finalizing the Installation
Once all components are securely in place, perform a final inspection to ensure proper installation. Check that the window kit is tightly sealed, the exhaust hose is connected without kinks, and the unit is level. Verify that all screws and brackets are tightened firmly. Test the unit by turning it on and ensuring it operates smoothly. Inspect for any air leaks around the window kit or exhaust hose connections. Clean up any debris or packaging materials from the installation area. Dispose of packaging responsibly. Double-check that all safety precautions, such as proper power connection and ventilation, are met. Finally, ensure the remote control is paired and functional. Your Midea MAP14AS1TWT-C is now ready for use.
Operating the Air Conditioner
Understand the control panel and remote setup for seamless operation. Select modes like Cool, Heat, Fan, or Dry based on your needs. Adjust settings using the remote or control panel for optimal performance.
5.1 Understanding the Control Panel
The control panel on your Midea MAP14AS1TWT-C air conditioner features intuitive buttons for mode selection, temperature adjustment, and fan speed control. Familiarize yourself with the LED display, which shows the current settings and any error codes. The panel allows you to switch between Cool, Heat, Fan, Dry, and Auto modes. Use the arrows to increase or decrease the set temperature. The fan speed can be adjusted to Low, Medium, or High for personalized comfort. Ensure you understand each function before operation. Refer to the manual for detailed explanations of symbols and error codes to troubleshoot issues effectively. Proper use of the control panel ensures efficient and comfortable operation of your air conditioner.
5.2 Setting Up the Remote Control
The remote control for your Midea MAP14AS1TWT-C air conditioner offers convenient operation from across the room. Begin by inserting the provided batteries into the remote, ensuring they are correctly oriented. Once installed, the remote should automatically pair with the air conditioner. Test the remote by pressing the power button or adjusting the temperature to ensure proper functionality. Use the mode button to cycle through Cool, Heat, Fan, Dry, and Auto settings. The remote also allows you to set a programmable timer and adjust fan speed. If the remote fails to respond, check the battery installation or refer to the manual for troubleshooting steps. Proper setup ensures seamless control over your air conditioner’s operations.
5.3 Selecting Operating Modes (Cool, Heat, Fan, Dry)
The Midea MAP14AS1TWT-C air conditioner offers four operating modes to suit different needs. Cool Mode lowers the room temperature, ideal for hot days. Heat Mode warms the space, perfect for colder environments. Fan Mode circulates air without cooling or heating, while Dry Mode reduces humidity. Use the remote control or the unit’s control panel to select the desired mode. For Cool, Heat, or Auto modes, ensure the exhaust hose is properly installed. In Fan or Dry modes, the exhaust hose can be removed. Adjust settings based on room conditions for optimal comfort. Proper mode selection ensures efficient operation and energy savings. Always refer to the manual for detailed instructions on mode usage and exhaust hose requirements.

Maintenance and Cleaning
Regularly clean the air filter and drain condensed water to ensure optimal performance. Clean the exterior and interior to maintain efficiency and longevity. Refer to the manual for detailed instructions.
6.1 Cleaning the Air Filter
Regular cleaning of the air filter is essential to maintain the air conditioner’s efficiency and performance. Turn off the unit and unplug it before starting. Remove the filter from the unit, usually located at the back or bottom, depending on the model. Use a soft brush or vacuum cleaner to remove dust and debris. For thorough cleaning, wash the filter with mild soap and warm water, then allow it to dry completely before reinstalling. Clean the filter every 1-2 weeks or as needed, especially in dusty environments. A dirty filter can reduce airflow and increase energy consumption. Always refer to the manual for specific cleaning instructions tailored to your Midea MAP14AS1TWT-C model.
6.2 Draining Condensed Water
Regular draining of condensed water is crucial to prevent leaks and ensure proper operation of your Midea MAP14AS1TWT-C air conditioner. Locate the drain hose or water drainage port, typically found at the rear or bottom of the unit. Attach the provided drain hose to the port, ensuring a secure connection. Direct the hose to a suitable drainage area, such as a floor drain or a large container. Check the hose for kinks or blockages to ensure smooth water flow. If your unit has an internal water pan, empty it periodically to prevent overflow. Refer to the manual for specific drainage instructions tailored to your model. Proper drainage maintains efficiency and prevents water damage or mold growth. Regular checks and maintenance are essential for optimal performance.
6.3 Cleaning the Exterior and Interior
Regular cleaning of both the exterior and interior of your Midea MAP14AS1TWT-C air conditioner is essential for maintaining efficiency and hygiene. For the exterior, use a soft, dry cloth to wipe away dust and dirt; Avoid harsh chemicals or abrasive cleaners, as they may damage the finish. For the interior, focus on the air filter, which should be cleaned every 1-2 months. Remove the filter, rinse it with warm water, and let it dry completely before reinstalling. Clean the interior vents and surfaces with a damp cloth, ensuring no moisture enters internal components. Regular cleaning prevents dust buildup, improves airflow, and reduces the risk of mold or mildew. Always unplug the unit before cleaning for safety. Maintain a clean unit to ensure optimal performance and extend its lifespan.
Troubleshooting Common Issues
This section addresses common issues such as no power, leaks, or unusual noises, providing practical solutions to ensure smooth operation and extend the unit’s lifespan effectively.
7.1 No Power or Unit Not Turning On
If the air conditioner does not turn on, first ensure the power cord is securely plugged into a functioning outlet. Check the circuit breaker or fuse box to confirm there are no tripped breakers or blown fuses. Verify that the outlet is working by testing it with another appliance. If the issue persists, inspect the power cord for damage or kinks. Ensure the child lock feature is not activated, as this may prevent the unit from turning on. If using the remote control, check the batteries and ensure it is functioning properly. If the unit still does not power on, there may be an internal electrical issue, such as a faulty PCB or compressor. In such cases, consult the manual or contact customer support for further assistance.
7.2 Leaks or Water Damage
If you notice leaks or water damage, immediately turn off the unit and unplug it from the power source. Check the exhaust hose for blockages or kinks, as this can cause internal condensation to leak. Ensure the drain hose is properly connected and directed to a suitable drainage location. Inspect the air filter for cleanliness, as a clogged filter can restrict airflow and lead to excessive condensation. Verify that the unit is installed on a level surface to prevent uneven water distribution. If the issue persists, check the internal drainage system for blockages or damage. Regularly cleaning the condenser coils and ensuring proper ventilation can help prevent water damage. For severe leaks, contact customer support for professional assistance.
7.3 Strange Noises or Vibration
If your Midea MAP14AS1TWT-C air conditioner produces strange noises or vibrations, turn it off immediately and unplug it. Check for blockages in the exhaust hose, as kinks or obstructions can cause unusual sounds. Ensure the unit is installed on a level surface, as misalignment can lead to vibration. Inspect the internal components, such as the fan blades, for debris or damage. Clean the air filter, as a clogged filter can cause the motor to work harder, leading to noise. If the issue persists, check the condenser coils for dust buildup. Restart the unit after addressing these issues. If the problem remains unresolved, contact customer support for professional assistance. Regular maintenance can help prevent such issues;

Warranty and Support
Your Midea MAP14AS1TWT-C air conditioner is backed by a comprehensive warranty. For details, refer to the warranty section in the manual or contact customer support.
8.1 Understanding the Warranty Terms
The Midea MAP14AS1TWT-C air conditioner is covered by a manufacturer’s warranty designed to protect your investment. The warranty typically includes coverage for parts and labor for a specified period, usually one year from the date of purchase. It is essential to review the warranty terms thoroughly to understand what is included and what may void the coverage. Proper installation and maintenance, as outlined in this manual, are often prerequisites for warranty validity. For detailed information, refer to the warranty section provided with your purchase or contact Midea’s customer support. Keeping the original receipt and manual is recommended for warranty claims. Regular maintenance and adherence to manufacturer guidelines can help ensure your warranty remains valid.
8.2 Contacting Customer Support
For any inquiries or assistance regarding your Midea MAP14AS1TWT-C air conditioner, you can contact Midea’s customer support team. They are available to address questions about installation, troubleshooting, warranty, or general product information. You can reach them via phone, email, or through the official Midea website. Ensure you have your model number and purchase details ready for efficient assistance. Additionally, the Midea website offers downloadable resources, including user manuals and FAQs, to help resolve common issues independently. For the most prompt service, visit the support section of the Midea website or refer to the contact information provided in your product manual. Regular updates and support materials are also available online to enhance your user experience.

Additional Resources
For further assistance, visit the official Midea website for downloadable manuals, installation guides, and troubleshooting videos. Additional resources include online FAQs and user forums for support.
9.1 Downloading the Full Manual
To access the complete installation manual for the Midea MAP14AS1TWT-C, visit the official Midea website. Navigate to the Support section and search for your model number. Select the Manuals & Guides option to download the PDF version. Ensure you have the latest Adobe Acrobat Reader installed to view the document. The manual covers detailed installation steps, safety precautions, and troubleshooting tips. Save the file for future reference or print it for easy access during setup. This resource is essential for proper installation and maintenance of your air conditioner. Regularly check the website for updates or revised versions.
9.2 Online Installation Guides and Videos
For a more visual and interactive experience, Midea offers online installation guides and videos specifically for the MAP14AS1TWT-C model. These resources are available on the official Midea website and popular platforms like YouTube. They provide step-by-step instructions, demonstrations, and tips to help you install and set up your portable air conditioner correctly. Videos often cover topics like window kit installation, exhaust hose setup, and connecting the unit to power. Additionally, online forums and DIY websites may feature user-generated tutorials and troubleshooting tips. These resources are particularly helpful for first-time installers or those who prefer visual guidance. Always refer to the official Midea website for the most accurate and up-to-date information.
By following the Midea MAP14AS1TWT-C installation manual, you have successfully set up your portable air conditioner for optimal performance. Proper installation, regular maintenance, and adherence to safety guidelines ensure efficiency and longevity. If you encounter any issues, refer to the troubleshooting section or contact Midea support. For additional guidance, explore online resources like installation videos and user forums. Remember to save this manual for future reference and enjoy the comfort of your Midea Duo portable air conditioner. If further assistance is needed, visit the official Midea website or consult customer support. Happy cooling!