Welcome to the Lil Sew and Sew Instruction Manual! This guide provides a comprehensive overview of the Lil Sew and Sew Mini Sewing Machine‚ designed for both beginners and experienced users. It covers unboxing‚ setup‚ basic operations‚ maintenance‚ troubleshooting‚ and advanced techniques to help you make the most of your sewing experience. By following this manual‚ you’ll master the essentials and unlock your creative potential with ease. Happy sewing!
1.1 Overview of the Lil Sew and Sew Mini Sewing Machine

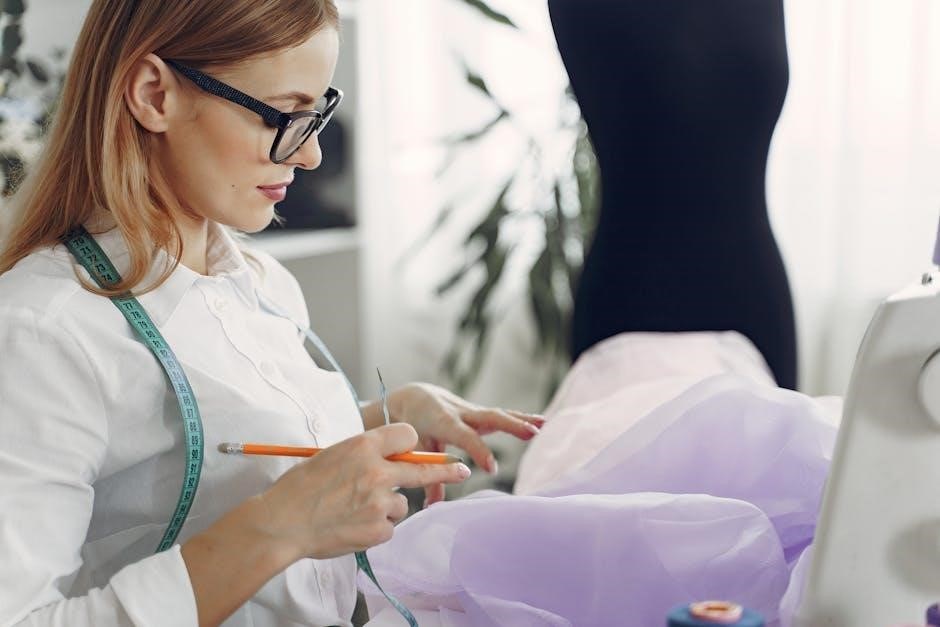
The Lil Sew and Sew Mini Sewing Machine is a portable‚ user-friendly device designed for hobbyists and DIY enthusiasts. It features a compact design‚ making it ideal for small sewing projects. With its lightweight build and easy-to-use controls‚ this machine is perfect for beginners and experienced sewists alike. The machine offers multiple stitch types‚ including straight and zigzag stitches‚ allowing for versatility in fabric handling. It also includes a manual for guidance on setup‚ threading‚ and troubleshooting. The Lil Sew and Sew Mini Sewing Machine is a great addition to any crafting toolkit‚ offering reliability and efficiency for various sewing tasks. Its compact size and simplicity make it a favorite among crafters and home sewers.
1.2 Importance of Reading the Manual
Reading the Lil Sew and Sew Instruction Manual is essential for optimal use of the mini sewing machine. The manual provides detailed instructions on setup‚ threading‚ and basic operations‚ ensuring users understand how to operate the machine safely and effectively. It also covers troubleshooting common issues‚ helping you resolve problems quickly. By following the manual‚ you can avoid potential damage to the machine and ensure longevity. The guide offers tips for maintaining the machine and enhancing your sewing experience; Whether you’re a beginner or an experienced sewer‚ the manual serves as a valuable resource to help you make the most of your Lil Sew and Sew Mini Sewing Machine. Take the time to read it carefully before starting your projects.
1.3 Key Features of the Lil Sew and Sew Machine
The Lil Sew and Sew Mini Sewing Machine is a compact‚ portable‚ and user-friendly device designed for various sewing tasks. It features multiple stitch options‚ an easy-to-use control panel‚ and a built-in sewing light for better visibility. The machine is ideal for beginners‚ offering a simple threading system and adjustable tension controls. It comes with essential accessories like a sewing kit‚ bobbins‚ and needles‚ making it ready to use right out of the box. Its lightweight design and versatile functionality make it perfect for small projects‚ repairs‚ and crafting. The machine also includes a comprehensive guide to help users navigate its features and troubleshooting common issues. This makes it an excellent choice for both hobbyists and occasional sewers.
Unboxing and Initial Setup
Start by carefully unboxing the Lil Sew and Sew machine and preparing a sturdy workspace. Follow the manual’s step-by-step guide for initial setup and safety precautions to ensure a seamless experience.
2.1 Unboxing the Lil Sew and Sew Machine
When unboxing the Lil Sew and Sew machine‚ carefully remove it from the packaging along with the included accessories‚ such as bobbins‚ needles‚ and a power cord. Inspect each item for damage and ensure all components are present. Place the machine on a sturdy‚ flat surface‚ such as a table‚ to prepare for setup. Handle the machine gently to avoid accidental damage. Take a moment to familiarize yourself with the machine’s parts by referring to the diagrams in the manual. Reading the manual beforehand will help you understand the machine’s features and proper handling. Once unboxed‚ you’re ready to proceed with the initial setup process.
2.2 Preparing the Workspace for Sewing
To ensure a smooth sewing experience‚ prepare your workspace by placing the Lil Sew and Sew machine on a sturdy‚ flat surface like a table or countertop. Clear the area of clutter and ensure good lighting to see your work clearly. Cover the surface with a protective cloth or mat to prevent damage from accidental scratches or spills. Keep essential supplies‚ such as fabric‚ threads‚ scissors‚ and notions‚ within easy reach. Organize your tools in a designated area to maintain efficiency. A well-prepared workspace minimizes distractions and allows you to focus on your sewing projects. Proper organization also helps prevent thread tangles and material misplacement‚ ensuring a more enjoyable and productive sewing session.
2.3 Initial Setup and Safety Precautions
Before using the Lil Sew and Sew machine‚ ensure it is placed on a stable‚ flat surface. Keep the area clear of clutter and flammable materials. Plug the machine into a nearby power outlet‚ using the provided cord. Always turn off the machine when not in use and unplug it for safety. Wear loose clothing tied back and avoid long jewelry that could get caught. Keep children and pets away while sewing. Never sew over fingers or body parts. Read the manual thoroughly before starting. Follow the setup guide carefully to ensure proper function. Regularly inspect the machine for damage or wear. By adhering to these precautions‚ you can enjoy a safe and efficient sewing experience with the Lil Sew and Sew machine.
Basic Operations and Controls
This section explains the Lil Sew and Sew machine’s controls‚ including the power switch‚ stitch selector‚ and foot pedal. Learn to operate the machine safely and efficiently.
3.1 Understanding the Sewing Machine Controls
Mastering the Lil Sew and Sew machine’s controls is essential for smooth operation. The power switch activates the motor‚ while the stitch selector allows you to choose between straight or zigzag stitches. The presser foot lever lowers and raises the foot‚ ensuring fabric stays in place. Use the handwheel to manually raise or lower the needle. Refer to the machine’s diagram for threading guides‚ marked from 1 to 6. Always ensure the power is off when threading. The tension dials adjust thread tightness‚ and the speed control lets you sew at a comfortable pace. Familiarize yourself with these controls to achieve precise and professional results in your sewing projects.
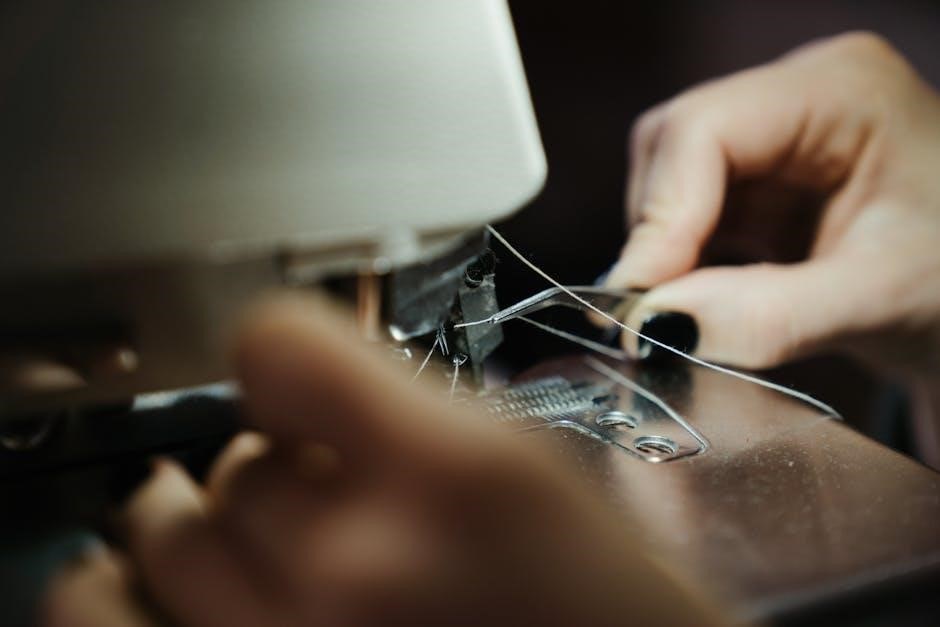
3.2 Threading the Machine: Step-by-Step Guide
To thread the Lil Sew and Sew machine‚ start by turning off the power and ensuring the needle is in its highest position. Locate the threading path marked from 1 to 6 on the machine. Begin at the spool pin‚ then guide the thread through each numbered guide in sequence. Pull about 6 inches of thread through the needle eye. Gently tug the thread to ensure it’s seated properly. Leave a small loop at the end for easy sewing. Hold the threads behind the needle and lower the presser foot to secure them. Always refer to the diagram in your manual for precise guidance. Proper threading ensures smooth stitching and prevents thread breakage during use.
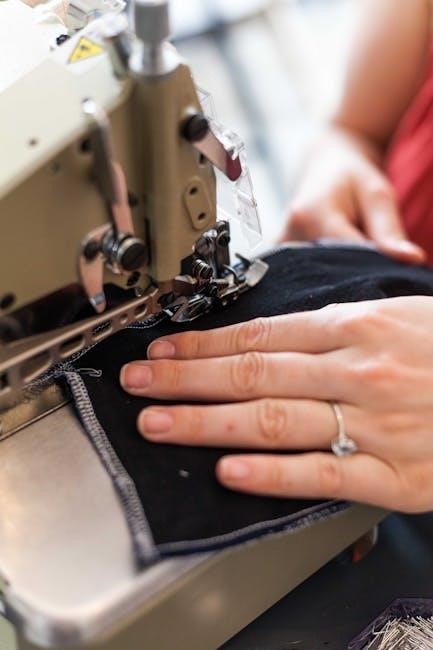
3.3 Basic Stitching and Sewing Techniques
Start with a straight stitch by aligning fabric edges under the presser foot. Gently guide the fabric as it moves under the needle. For backstitching‚ sew a few stitches forward‚ then reverse for a secure seam start. Use the handwheel to control the needle for precise stitching. Keep fabric taut but not stretched to maintain even tension. Practice on scrap fabric to master basic techniques. For thicker materials‚ use a heavier needle and adjust stitch length. Always ensure the presser foot is lowered before sewing to prevent fabric slippage. These fundamental techniques will help you achieve professional-looking results with your Lil Sew and Sew machine. Refer to the manual for additional tips on handling different fabrics and stitch types.
Maintenance and Care
Regularly clean the machine to remove dust and debris. Oil moving parts to ensure smooth operation. Store the machine in a dry‚ cool place to prevent damage.
4.1 Cleaning the Sewing Machine
Cleaning your Lil Sew and Sew machine is essential for maintaining its performance and longevity. Always unplug the machine before cleaning to ensure safety. Use a soft-bristled brush to gently remove dust‚ lint‚ and debris from the exterior and internal components‚ such as the bobbin area and presser foot. Avoid using liquids or harsh chemicals‚ as they may damage the machine’s finish or electrical parts. For stubborn lint buildup‚ a small‚ dry cotton swab can be used. Regular cleaning prevents thread breakage and ensures smooth stitching. Refer to the manual for specific cleaning recommendations tailored to your machine’s model. Keeping your machine clean will help it run efficiently and extend its lifespan.
4.2 Oiling and Lubrication Tips
Regular oiling is crucial for maintaining your Lil Sew and Sew machine’s smooth operation. Use a few drops of high-quality sewing machine oil on moving parts‚ such as the hand wheel‚ gears‚ and shuttle hook. Avoid applying oil to the needle bar or bobbin area‚ as this can attract lint and cause issues. Turn the hand wheel gently to distribute the oil evenly. Oiling should be done every 10-15 hours of use or when you notice increased noise or friction. Always refer to the manual for specific lubrication points. Proper lubrication ensures quiet operation‚ prevents wear‚ and extends the machine’s lifespan. After oiling‚ wipe off any excess with a soft cloth to prevent residue buildup. Regular maintenance will keep your machine running smoothly for years.
4.3 Storing the Machine Properly
Proper storage of the Lil Sew and Sew machine is essential to maintain its performance and longevity. Before storing‚ ensure the machine is clean and free of dust or debris. Disconnect the power cord and remove any remaining thread or bobbins to prevent tangling. Store the machine in its original packaging or a sturdy‚ protective cover to shield it from dust and moisture. Place it in a dry‚ cool environment‚ avoiding direct sunlight or extreme temperatures. Avoid stacking heavy objects on top of the machine to prevent damage. For extended storage‚ periodically check the machine to ensure it remains in good condition. Follow these steps to keep your Lil Sew and Sew machine in optimal shape for future use.
Troubleshooting Common Issues
Identify common problems like thread breakage or uneven stitching. Refer to the troubleshooting section for solutions‚ such as re-threading or adjusting tension. Ensure proper machine maintenance for smooth operation.
5.1 Common Problems and Solutions
Common issues with the Lil Sew and Sew machine include thread breakage and uneven stitching. To resolve thread breakage‚ ensure the machine is properly threaded following the manual’s guidelines. Check for tangled threads or incorrect tension settings. For uneven stitching‚ inspect the needle for damage or incorrect installation. Regularly clean and oil the machine to maintain smooth operation. If issues persist‚ consult the troubleshooting section or contact customer support. Proper maintenance and adherence to the manual’s instructions can prevent many of these problems‚ ensuring a seamless sewing experience.
5;2 Fixing Thread Breakage and Tension Issues
Thread breakage and tension issues are common challenges when using the Lil Sew and Sew machine. To fix thread breakage‚ ensure the machine is turned off and rethread it carefully following the manual’s guidelines. Check for any tangles or knots in the thread. For tension issues‚ adjust the upper thread tension dial to achieve a balanced stitch. If the problem persists‚ clean the machine’s tension discs and ensure the bobbin is correctly seated. Use high-quality thread and the appropriate needle type for your fabric. Regularly oiling the machine can also prevent thread breakage. Always refer to the manual for specific tension settings and troubleshooting tips to maintain optimal performance.
Advanced Sewing Techniques
Master advanced sewing techniques with the Lil Sew and Sew machine! Explore working with various fabrics‚ creating custom stitch patterns‚ and tackling complex projects. Expand your skills with additional attachments and accessories to enhance your sewing capabilities. Elevate your craftsmanship and take your projects to the next level with precision and creativity.
6.1 Working with Different Fabric Types
Working with various fabrics is essential for versatile sewing projects. The Lil Sew and Sew machine is compatible with a wide range of fabrics‚ including cotton‚ polyester‚ silk‚ and denim. For delicate fabrics like silk‚ use a sharp needle and reduce tension. For heavier fabrics such as denim‚ switch to a heavy-duty needle and increase the stitch length. Always pre-wash fabrics to ensure proper fit and drape. Experiment with different settings to achieve optimal results. By understanding fabric types and adjusting machine settings accordingly‚ you can enhance the quality of your sewing projects and expand your creative possibilities.
6.2 Custom Stitch Patterns and Settings
The Lil Sew and Sew machine offers a variety of stitch patterns and customizable settings to cater to different sewing needs. Users can choose from straight stitch‚ zigzag‚ and decorative stitches‚ each suitable for specific fabrics and techniques. Adjusting stitch length and width is straightforward using the control dial or digital interface. For instance‚ shorter stitches are ideal for delicate fabrics‚ while longer stitches work best for heavier materials. The machine also allows for custom stitch combinations‚ enabling users to create unique patterns. Additionally‚ some models feature memory storage for frequently used stitch settings‚ enhancing efficiency. Experimenting with these options empowers users to tailor their projects with precision and creativity‚ ensuring professional-quality results every time.
6.3 Advanced Projects for Skill Enhancement
Once you’ve mastered the basics‚ the Lil Sew and Sew machine invites you to explore advanced projects that refine your sewing skills. Create intricate zipper pouches‚ tailored garments‚ or home décor items like curtains and quilts. Practice sewing buttonholes‚ working with elastic‚ and crafting custom embroidery patterns. These projects challenge your creativity and precision‚ helping you achieve professional-quality finishes. The machine’s adjustable stitch settings and compatibility with various fabrics make it ideal for experimenting with complex designs. By tackling these advanced tasks‚ you’ll gain confidence and expertise‚ unlocking new possibilities for your sewing journey. Each project serves as a stepping stone toward mastering even more complex techniques.
6.4 Using Additional Attachments and Accessories
The Lil Sew and Sew machine supports various attachments and accessories to enhance your sewing experience. Use the zipper foot for precise zipper installations or the buttonhole attachment for custom buttons. A gathering foot can help create elegant ruffles‚ while an embroidery hoop allows for decorative stitching. Explore optional presser feet designed for specific tasks‚ such as quilting or hemming. These additions expand the machine’s capabilities‚ enabling you to tackle a wider range of projects with ease. Always refer to the manual for compatibility and installation guidance. Experimenting with these tools will unlock new creative possibilities and help you achieve professional-quality results in your sewing endeavors.
7.1 Summary of Key Takeaways
This manual has provided a detailed guide to using the Lil Sew and Sew Mini Sewing Machine‚ from unboxing to advanced techniques. Key takeaways include proper setup‚ threading‚ and maintenance to ensure optimal performance. Always refer to the diagram in your manual for threading guidance and keep the machine clean and well-lubricated. Troubleshooting common issues like thread breakage and tension problems can save time and improve results. Practice basic stitches and explore advanced projects to enhance your sewing skills. Remember to follow safety precautions and store the machine properly when not in use. With consistent practice‚ you’ll master the Lil Sew and Sew machine and unlock endless creative possibilities in sewing.
7.2 Encouragement for Continued Practice
Congratulations on completing the Lil Sew and Sew manual! Consistent practice is essential to mastering your sewing skills. Dedicate time weekly to explore new techniques and projects‚ starting with simple tasks and gradually tackling more complex ones. Embrace challenges as opportunities to learn and grow. Experiment with different fabrics‚ stitches‚ and custom patterns to expand your creativity. Remember‚ every project is a step toward improving your craftsmanship. Keep experimenting‚ stay curious‚ and enjoy the journey of creating something unique with your Lil Sew and Sew machine. Happy sewing and congratulations on taking the first steps to becoming a skilled sewer!